This is my blog on how I created each part of my Visit Essex 3D animation.
Over the past eleven weeks I have been keeping notes on what work I have been doing. I have waited until the assignment was finished to add these notes to my blog.
This was done in order to create a chronological section order.
Thursday, 9 December 2010
Week 1: Assignment Outline & Initial Ideas
For this assignment we are required to assemble in to groups of 3 - 5 in order to create an animation featuring and promoting tourism in Essex.
Firstly, I decided that I wanted to do this assignment on my own. I decided this for a number of reasons:
1. I wanted full control of the animation.
2. I was not comfortable in forming a group with people who could be unreliable.
3. I wanted to keep consistency with the design of models and style of animation.
4. The animation would be useful for my personal portfolio.
We have been informed that we will be having a meeting with Ms. Elli Constantatou, the Marketing and PR Manager at Essex County Council, on Wednesday 29th September. This meeting will cover what she is most interested in seeing and her ideas on the animation. We were also informed of the possibility on having some of our animations to the website she manages. (www.visitessex.com).
This assignment gives us the unique opportunity to design and produce an animation for a client.
Personally, I am excited about this assignment. I have undertaken a vast amount of work but am confident that I will complete the assignment to a standard I am happy with.
Week 2: Meeting with Elli Constantatou & Initial Ideas
On September 29th 2010 all the groups had a meeting with Elli Constantatou, the Marketing and PR Manager at Essex County Council.
We were informed on what type of animations she expected from the groups the type of animations she would like to see.
We were given information on the different events that were held in Essex and statistics on tourism and were informed that we could interpret the brief however we wanted.
After the meeting I started to think about what I was going to animate.
I made the decision to feature locations and attractions that were appropriate for families. Further more, I decided to feature locations and attractions that were available all year round.
With this in mind I decided to include:
The Royal Gunpowder Mills
Colchester Zoo
The East Anglian Railway Museum
The North Weald Air Museum
Adventure Island
Audley End House and Grounds
Colchester Castle
I felt that these locations and activities would best represent Essex as a place suitable for family tourism at any time of year.
After I had decided what I was going to animate, I turned to the art style of the animation. Up until this point all my assignments had been modelled to be as photorealistic as possible. With this in mind I decided to use a bright, vibrant colour palate whilst creating realistic models.
Making the colour palate bright and vibrant would lend itself to the flow and pacing of the animation. I decided the animation would short and to the point with great care that it flowed smoothly into showing each attraction.
I then decided that I would include a voice-over to grab the attention the viewer and explain the different attractions.
I also decided to spend a lot of time on the sound effects and backing music to further draw the viewer into the animation.
Finally, I decided I need to include the Visit Essex website logo.
Week 3: Presentation
All the groups were required to give a presentation to the other groups. It was interesting to see the other groups ideas and there were definitely similarities with the different groups animation. A was apparent that at least two of the other groups had a similar idea to me.
After noticing these similarities I decided that I would change my initial thought on how I was going to execute my animation.
After noticing these similarities I decided that I would change my initial thought on how I was going to execute my animation.
Week 4: Development & Storyboard
After I decided on what I wanted to animate I took time to decide how I was going to animate it.
Because I wanted the animation to flow smoothly, I decided that all the attractions should be featured in one seamless animation. This would ensure a well paced interesting advertisement with constant description from the voice-over.
I decided that the camera should be flying along a winding road in the Essex countryside. As the camera rounds a bend, a new attraction appears. After the camera has rounded the next bend, the previous attraction would then disappear. This would ensure that only one attraction would ever be seen because the camera would sometimes point back to where it came from.
With this in mind I started to storyboard my animation. The storyboard is rough but gives a good idea of what I wanted.


1. The camera is high above England and dollies in through the clouds towards Essex.
2. The camera continues to dolly through the clouds and emerges above Essex where a car can be seen on a winding country road.
3. The camera levels out behind the car and follows it along the road. The camera then moves forward and overtakes the car.
4. The camera rounds a bend to reveal a roller coaster representing Adventure Island. A roller coaster car then zooms across the track.
5. The camera then rounds a bend to reveal Colchester Castle with a suit of armour waving at the camera.
6. The camera then rounds a bend to reveal a Baker Rifle representing the Royal Gunpowder Mills. The Rifle then cocks and fires producing smoke from the barrel.
7. The camera then rounds a bend to reveal a steam train representing the East Anglian Railway Museum with smoke emerging from the chimney.
8. The camera then rounds a bend to reveal Audley End House and Grounds.
9. The camera then rounds a bend to reveal a Spitfire representing the North Weald Air Museum. The Spitfire then swoops down over the camera and flies off.
10. The camera then rounds a bend to reveal an elephant that represents Colchester Zoo. The elephant then lifts its trunk, flaps its ears and trumpets.
11. The camera then rounds a bend, slows and lets the car move ahead. The camera then stops and fades to black as the car drives off into the sunset.
12. The scene fades in from black showing a model of Essex with each of the visited attractions highlighted on the model.
Because I wanted the animation to flow smoothly, I decided that all the attractions should be featured in one seamless animation. This would ensure a well paced interesting advertisement with constant description from the voice-over.
I decided that the camera should be flying along a winding road in the Essex countryside. As the camera rounds a bend, a new attraction appears. After the camera has rounded the next bend, the previous attraction would then disappear. This would ensure that only one attraction would ever be seen because the camera would sometimes point back to where it came from.
With this in mind I started to storyboard my animation. The storyboard is rough but gives a good idea of what I wanted.


1. The camera is high above England and dollies in through the clouds towards Essex.
2. The camera continues to dolly through the clouds and emerges above Essex where a car can be seen on a winding country road.
3. The camera levels out behind the car and follows it along the road. The camera then moves forward and overtakes the car.
4. The camera rounds a bend to reveal a roller coaster representing Adventure Island. A roller coaster car then zooms across the track.
5. The camera then rounds a bend to reveal Colchester Castle with a suit of armour waving at the camera.
6. The camera then rounds a bend to reveal a Baker Rifle representing the Royal Gunpowder Mills. The Rifle then cocks and fires producing smoke from the barrel.
7. The camera then rounds a bend to reveal a steam train representing the East Anglian Railway Museum with smoke emerging from the chimney.
8. The camera then rounds a bend to reveal Audley End House and Grounds.
9. The camera then rounds a bend to reveal a Spitfire representing the North Weald Air Museum. The Spitfire then swoops down over the camera and flies off.
10. The camera then rounds a bend to reveal an elephant that represents Colchester Zoo. The elephant then lifts its trunk, flaps its ears and trumpets.
11. The camera then rounds a bend, slows and lets the car move ahead. The camera then stops and fades to black as the car drives off into the sunset.
12. The scene fades in from black showing a model of Essex with each of the visited attractions highlighted on the model.
Week 5: Final Ideas
After reviewing my storyboard I decided to make some changes because I realised that the amount of work I would need to do was huge.
Firstly I decided to remove the car. It would take a long tile to model a car and driver that will need to be detailed because it’s so close to the camera. Seeing as the car would only be seen for about 10 seconds it would not be worth the time.
The second model I decided to remove from the animation was the waving suit of armour from Colchester Castle. I decided to remove this because I felt the model of Colchester Castle itself was enough to feature that attraction. I also decided to remove the model because the rigging and skinning of the model would take a long time and be difficult to look as though it was armour and nor an organic structure. I would also be rigging and skinning my elephant for animation so I was not worried about a lack of character animation.
The third model I decided to remove was Audley End House and Grounds. This was removed because I had already decided to include Colchester Castle as a historic building.
Finally, I decided to remove the locations of the attractions from the model of Essex. I decided to do this because on further investigation, the attractions I had chosen weren’t spread over Essex and it would not look very good.
I also decided to add some models to the animation.
First of all I decided to add a sign next to each attraction with that attraction logo. This would be to help identify the attraction.
I also decided to include two advertisement billboards featuring facts on all the houses and historic buildings in Essex, and Lakeside shopping centre.
Making these as billboards reduced the need to make large time consuming models. The billboards also aided to the look of the camera following a road.
I decided to turn the last scene with the model of Essex into an advertisement for the Visit Essex website. To do this I will use the Visit Essex logo and keep a colour theme for the Essex model.
I finally decided to add a ‘Welcome to Essex’ sign when the camera dollies into the road.
I also realised that depending on how the road was laid out, I might need to change the order of the attractions features.
All of these changes I feel were either necessary or would improve the quality of the animation.
Week 6: Research & Preparation
It became apparent that it was necessary for my to fully research each of the attractions I was going to feature in my animation. The research was needed to accurately depict each attraction and the activities available.
The Royal Gunpowder Mills - I found that there were demonstrations of 19th century weaponry. I particular Muskets and flintlock Rifles. This helped me decide that I was going to animate an 1806 Baker Rifle

Colchester Zoo - By researching the animals at Colchester Zoo I discovered that they have both Indian and African elephants. This means that I could model and animate any one I wanted.

The East Anglian Railway Museum - While researching I found that the museum housed many old steam trains. This helped me decide the train I was gong to model.

The North Weald Air Museum - I had always wanted to model a Spitfire for this attractions so I researched the museum to see if they had a Spitfire. Luckily they did so I was able to model and animate one.

Adventure Island - For this attraction I knew I wanted to animate a thrill ride, more specifically a roller coaster. By researching Adventure Island I found the colour scheme of Rage, the roller coaster, was pink and yellow. It also indicated how the track was constructed in a triangular shape.

Colchester Castle - The research I did on the castle helped me find the design and colours of the castle. The research also helped me decide what angle of the castle I would model for. I decided to model the front and right side of the castle because I thought the heavily ruined wall was very interesting.

Signs - I researched all the logos of the different attractions to make the signs seem as realistic as possible.


Billboards - I used the Visit Essex website to get information on the number of country houses in Essex and the number of shops in Lakeside shopping centre.


Visit Essex Logo - I also used the Visit Essex website to get the Visit Essex logo.

Welcome Sign - I finally research a the Essex crest and used it to create a ‘Welcome to Essex’ sign.

Because I had planned to undertake such a large animation I had to make sure that all my preparation was completed before I started the modelling and animation process.
This mainly entailed me searching for appropriate high quality reference images to use for modelling.
Baker Rifle Reference Image

Train Reference Image

Elephant Reference Image

Spitfire Reference Image

Roller Coaster Reference Image

Colchester Castle Reference Image

Essex Reference Image

The Royal Gunpowder Mills - I found that there were demonstrations of 19th century weaponry. I particular Muskets and flintlock Rifles. This helped me decide that I was going to animate an 1806 Baker Rifle

Colchester Zoo - By researching the animals at Colchester Zoo I discovered that they have both Indian and African elephants. This means that I could model and animate any one I wanted.

The East Anglian Railway Museum - While researching I found that the museum housed many old steam trains. This helped me decide the train I was gong to model.

The North Weald Air Museum - I had always wanted to model a Spitfire for this attractions so I researched the museum to see if they had a Spitfire. Luckily they did so I was able to model and animate one.

Adventure Island - For this attraction I knew I wanted to animate a thrill ride, more specifically a roller coaster. By researching Adventure Island I found the colour scheme of Rage, the roller coaster, was pink and yellow. It also indicated how the track was constructed in a triangular shape.

Colchester Castle - The research I did on the castle helped me find the design and colours of the castle. The research also helped me decide what angle of the castle I would model for. I decided to model the front and right side of the castle because I thought the heavily ruined wall was very interesting.

Signs - I researched all the logos of the different attractions to make the signs seem as realistic as possible.


Billboards - I used the Visit Essex website to get information on the number of country houses in Essex and the number of shops in Lakeside shopping centre.


Visit Essex Logo - I also used the Visit Essex website to get the Visit Essex logo.

Welcome Sign - I finally research a the Essex crest and used it to create a ‘Welcome to Essex’ sign.

Because I had planned to undertake such a large animation I had to make sure that all my preparation was completed before I started the modelling and animation process.
This mainly entailed me searching for appropriate high quality reference images to use for modelling.
Baker Rifle Reference Image

Train Reference Image

Elephant Reference Image

Spitfire Reference Image

Roller Coaster Reference Image

Colchester Castle Reference Image

Essex Reference Image

Week 7: Modelling
England
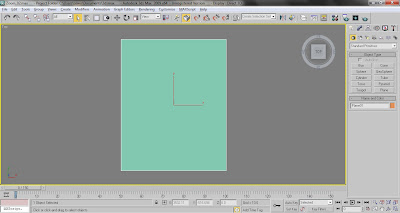
The model creation for the United Kingdom was very simple because it would be a high resolution texture. Dude to this I only had to make a large plane.
Baker Rifle
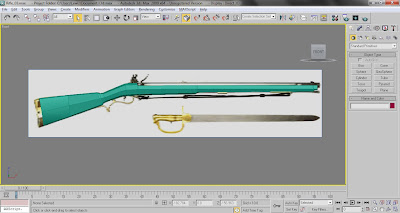
To create the Baker rifle I started by making a 6 sided cylinder. This was then changes to an editable poly and extruded whilst tweaking the vertices to form the body of the Rifle. I finally added a Meshsmooth modifier.
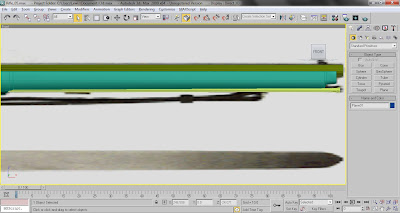
The next step I took was to create a long thin cylinder. This was then changed to an editable poly and extruded and scaled to form, the ramrod and ramrod tip.
I then made a box, turned it to an editable poly and extruded the edges along to form the trigger guard. I then added a Meshsmooth modifier. also made two long, thin 6 sided cylinders to form the ramrod tubes.

I then created a long cylinder which I made hollow by insetting and extruding the cap inwards after I turned it to an editable poly.
I also made a box, turned it into an editable poly and extruded the edges out to form the brass butt plate.
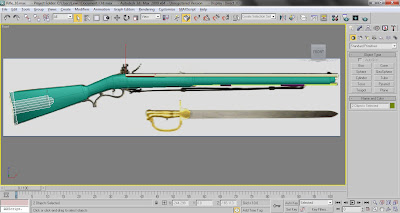
I then created a number of boxes and turned them into editable polys. I then in turn extruded each of the boxes edges along to form the different parts of the trigger assembly.
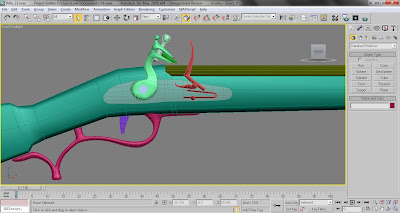
The final stage was to make three last boxes which I again turned to editable polys and extruded the edges out to form the sights and the bayonet attach point.
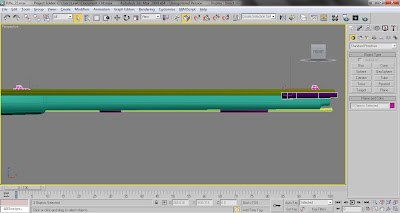
Spitfire
To create my Spitfire model I started by creating a box which I turned to an editable poly and extruded the edges down to form the outline of the Spitfire. I then tweaked the vertices in multiple viewports to further create the Spitfire outline.
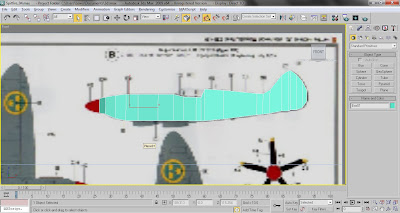
I then cut the model down the middle and cut an extra line to form the beginning of the wing. I then tweaked the vertices to further create the Spitfire shape.
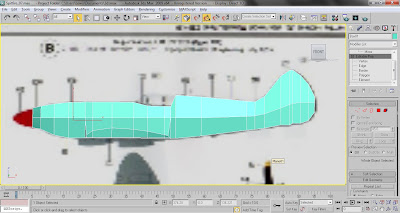
I then extruded the edges out along the beginning of the wing multiple times, tweaking the vertices as I went, to form the wing. I repeated this process on the fins at the tail end of the Spitfire.
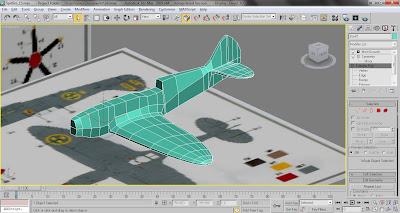
The next step I took was to inset the polys at the bottom of the model and extrude them outwards to form the air intake vents.
I then created a scaled sphere to form the cockpit glass and an scaled cylinder to form the Spitefire nosecone.
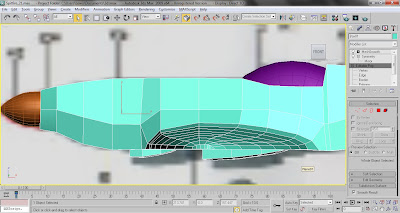
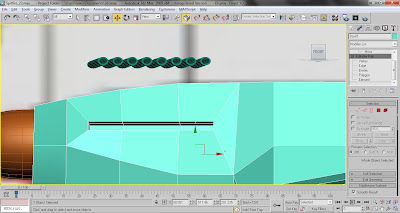
I then inset the polys along the front side of the Spitfire and extruded them inwards to form the space where the engine exhaust would protrude.
I then created a number of hollow cylinders and put them inside the hole I had just made. This formed the Spitfire Engine.
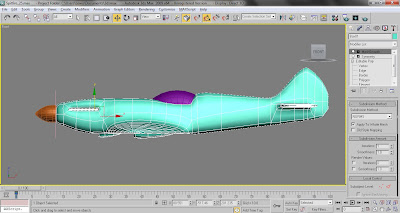
I finally added a symmetry and Meshsmooth modifier to the Spitfire.
Roller Coaster
I started by creating a box which I turned to an editable poly. I then inset and extruded a number of polys to form the car interior. I then created a box and put it inside the car to create the seat.
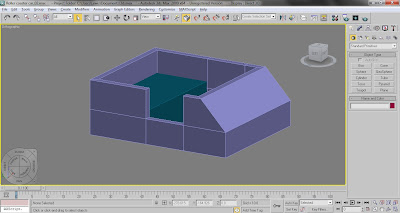
The next step was to create a box and a number of cylinders which I scaled to form the roller coaster wheels. I also added a Turbosmooth modifier.

To create the track I made three long cylinders which I arranged into a triangle. I then made three smaller cylinders which I used to connect the three original cylinders. I then copied these smaller cylinders multiple times down the length of the large cylinders.
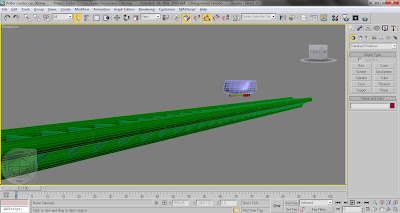
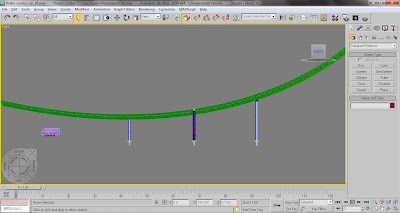
I finally added a bend modifier to the track. I then made a number of editable poly cylinders and boxes which I extruded to make the steel supports.
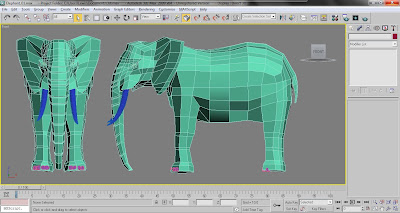
Elephant
I started using my old elephant as a template and created a plane which I turned to an editable poly. I then extruded the edges out and tweaked the vertices in multiple viewports to create the face and trunk of the elephant.
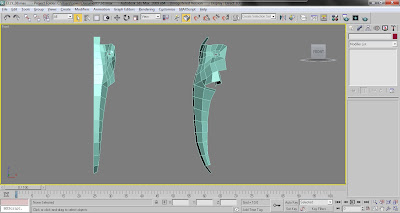
I carried on extruding the edges to create the tusk sockets and top of the head.
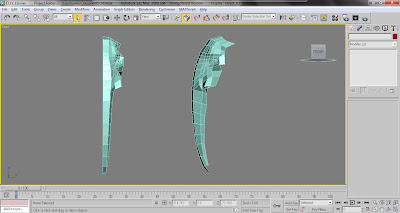
I then extruded the edges to form the mouth, ears and neck. I spent a lot of time tweaking the vertices to form the final elephant head.
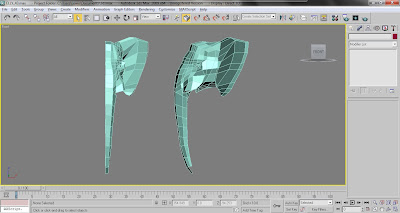
The next step was to take the edge loop around the neck and extrude it down to form the elephant body. I took a poly, inset it and extruded it downwards to start forming the legs.
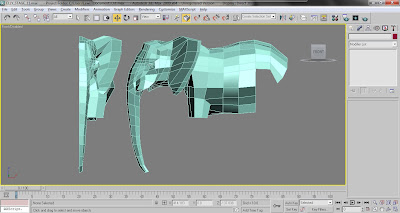
I carried on this process to form the back leg and the tail. I also extruded the vertices in multiple viewports to form the final back and belly of the elephant.
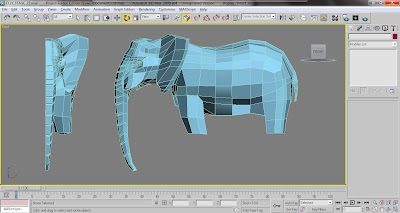
The final part of the model was to carry on extruding the legs down. IA symmetry modifier was then added and I created two spheres for eyes and two scaled cylinders for tusks.
I finally created sixteen Turbosmoothed boxes for nails.
Train
I started the train model my making a series of editable poly cylinders and boxes and edited them to form the train tank, train base and train cabin.
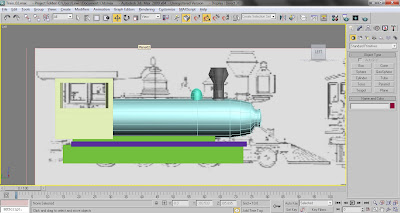
I then created more editable poly cylinders and boxes and edited them to form the cabin roof, wheels and cow catcher.
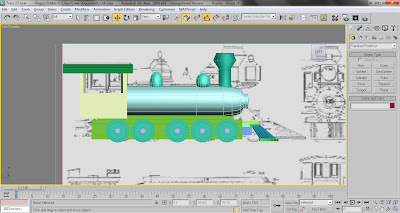
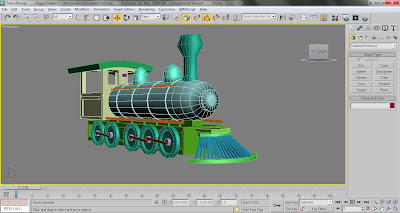
The final part of the train was to add boxes around the wheels and cylinders around the tank and base to add detail to the train.
Colchester Castle.
I started by making four boxes and one cylinder which I turned to editable polys and positioned them.
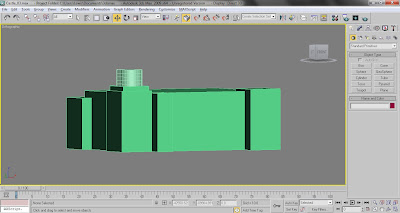
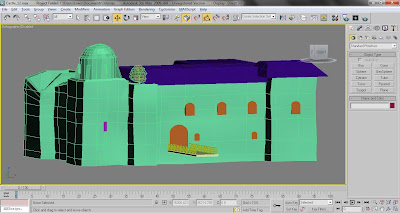
I then turned these objects into a single editable poly and extruded/scaled the edges to form the dome roof and ruins. I also created two editable poly boxes whose vertices I tweaked to form the roof. I then created a box which I scaled to form a door. This was copied and scaled to form the windows. I then made a series of boxes which I scaled and copied to form the bridge and hand rail.

The next stage was to then create some geometry which would act as detailing and add a small oak tree to the roof.

The final stage was to add a noise modifier to the model and tweak the settings to make the building look old and uneven.
Signs
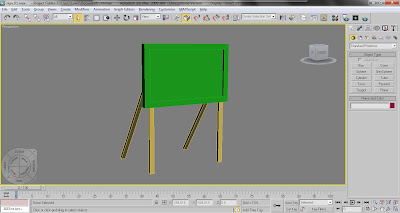
To create the signs I created a Box which I turned to an editable poly. I then inset and extruded a poly to form the space where the picture would go.
I finally added four boxes to forum legs and supports.
Billboards
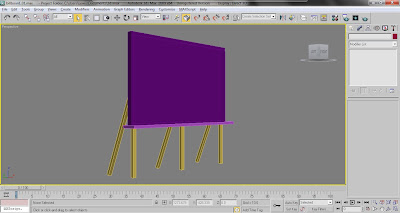
To create the billboards I created a Box which I turned to an editable poly. I then inset and extruded a poly to form the space where the picture would go.
I finally added four six to forum legs and supports.
3D Essex
I started by tracing the outline of a picture of Essex with the line tool. I then changes this to an editable poly.
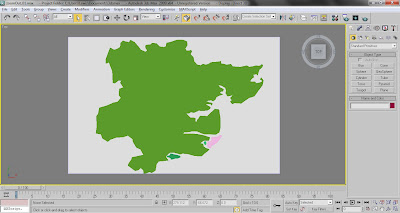
I then took the line edge loop and extruded it downwards.
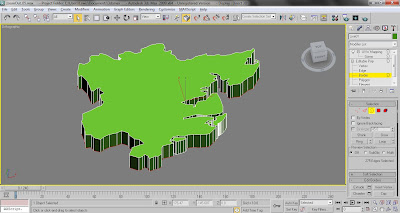
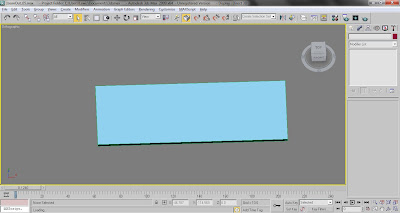
Visit Essex Logo
To create the logo I simply created a box which I scaled to be thin.
The model creation for the United Kingdom was very simple because it would be a high resolution texture. Dude to this I only had to make a large plane.

Baker Rifle
To create the Baker rifle I started by making a 6 sided cylinder. This was then changes to an editable poly and extruded whilst tweaking the vertices to form the body of the Rifle. I finally added a Meshsmooth modifier.

The next step I took was to create a long thin cylinder. This was then changed to an editable poly and extruded and scaled to form, the ramrod and ramrod tip.

I then made a box, turned it to an editable poly and extruded the edges along to form the trigger guard. I then added a Meshsmooth modifier. also made two long, thin 6 sided cylinders to form the ramrod tubes.

I then created a long cylinder which I made hollow by insetting and extruding the cap inwards after I turned it to an editable poly.
I also made a box, turned it into an editable poly and extruded the edges out to form the brass butt plate.

I then created a number of boxes and turned them into editable polys. I then in turn extruded each of the boxes edges along to form the different parts of the trigger assembly.

The final stage was to make three last boxes which I again turned to editable polys and extruded the edges out to form the sights and the bayonet attach point.

Spitfire
To create my Spitfire model I started by creating a box which I turned to an editable poly and extruded the edges down to form the outline of the Spitfire. I then tweaked the vertices in multiple viewports to further create the Spitfire outline.

I then cut the model down the middle and cut an extra line to form the beginning of the wing. I then tweaked the vertices to further create the Spitfire shape.

I then extruded the edges out along the beginning of the wing multiple times, tweaking the vertices as I went, to form the wing. I repeated this process on the fins at the tail end of the Spitfire.

The next step I took was to inset the polys at the bottom of the model and extrude them outwards to form the air intake vents.
I then created a scaled sphere to form the cockpit glass and an scaled cylinder to form the Spitefire nosecone.

I then inset the polys along the front side of the Spitfire and extruded them inwards to form the space where the engine exhaust would protrude.
I then created a number of hollow cylinders and put them inside the hole I had just made. This formed the Spitfire Engine.

I finally added a symmetry and Meshsmooth modifier to the Spitfire.

Roller Coaster
I started by creating a box which I turned to an editable poly. I then inset and extruded a number of polys to form the car interior. I then created a box and put it inside the car to create the seat.

The next step was to create a box and a number of cylinders which I scaled to form the roller coaster wheels. I also added a Turbosmooth modifier.

To create the track I made three long cylinders which I arranged into a triangle. I then made three smaller cylinders which I used to connect the three original cylinders. I then copied these smaller cylinders multiple times down the length of the large cylinders.

I finally added a bend modifier to the track. I then made a number of editable poly cylinders and boxes which I extruded to make the steel supports.

Elephant
I started using my old elephant as a template and created a plane which I turned to an editable poly. I then extruded the edges out and tweaked the vertices in multiple viewports to create the face and trunk of the elephant.

I carried on extruding the edges to create the tusk sockets and top of the head.

I then extruded the edges to form the mouth, ears and neck. I spent a lot of time tweaking the vertices to form the final elephant head.

The next step was to take the edge loop around the neck and extrude it down to form the elephant body. I took a poly, inset it and extruded it downwards to start forming the legs.

I carried on this process to form the back leg and the tail. I also extruded the vertices in multiple viewports to form the final back and belly of the elephant.

The final part of the model was to carry on extruding the legs down. IA symmetry modifier was then added and I created two spheres for eyes and two scaled cylinders for tusks.
I finally created sixteen Turbosmoothed boxes for nails.
Train
I started the train model my making a series of editable poly cylinders and boxes and edited them to form the train tank, train base and train cabin.

I then created more editable poly cylinders and boxes and edited them to form the cabin roof, wheels and cow catcher.

The final part of the train was to add boxes around the wheels and cylinders around the tank and base to add detail to the train.

Colchester Castle.
I started by making four boxes and one cylinder which I turned to editable polys and positioned them.

I then turned these objects into a single editable poly and extruded/scaled the edges to form the dome roof and ruins. I also created two editable poly boxes whose vertices I tweaked to form the roof. I then created a box which I scaled to form a door. This was copied and scaled to form the windows. I then made a series of boxes which I scaled and copied to form the bridge and hand rail.

The next stage was to then create some geometry which would act as detailing and add a small oak tree to the roof.

The final stage was to add a noise modifier to the model and tweak the settings to make the building look old and uneven.

Signs
To create the signs I created a Box which I turned to an editable poly. I then inset and extruded a poly to form the space where the picture would go.
I finally added four boxes to forum legs and supports.

Billboards
To create the billboards I created a Box which I turned to an editable poly. I then inset and extruded a poly to form the space where the picture would go.
I finally added four six to forum legs and supports.

3D Essex
I started by tracing the outline of a picture of Essex with the line tool. I then changes this to an editable poly.

I then took the line edge loop and extruded it downwards.

Visit Essex Logo
To create the logo I simply created a box which I scaled to be thin.

Subscribe to:
Comments (Atom)