The model creation for the United Kingdom was very simple because it would be a high resolution texture. Dude to this I only had to make a large plane.

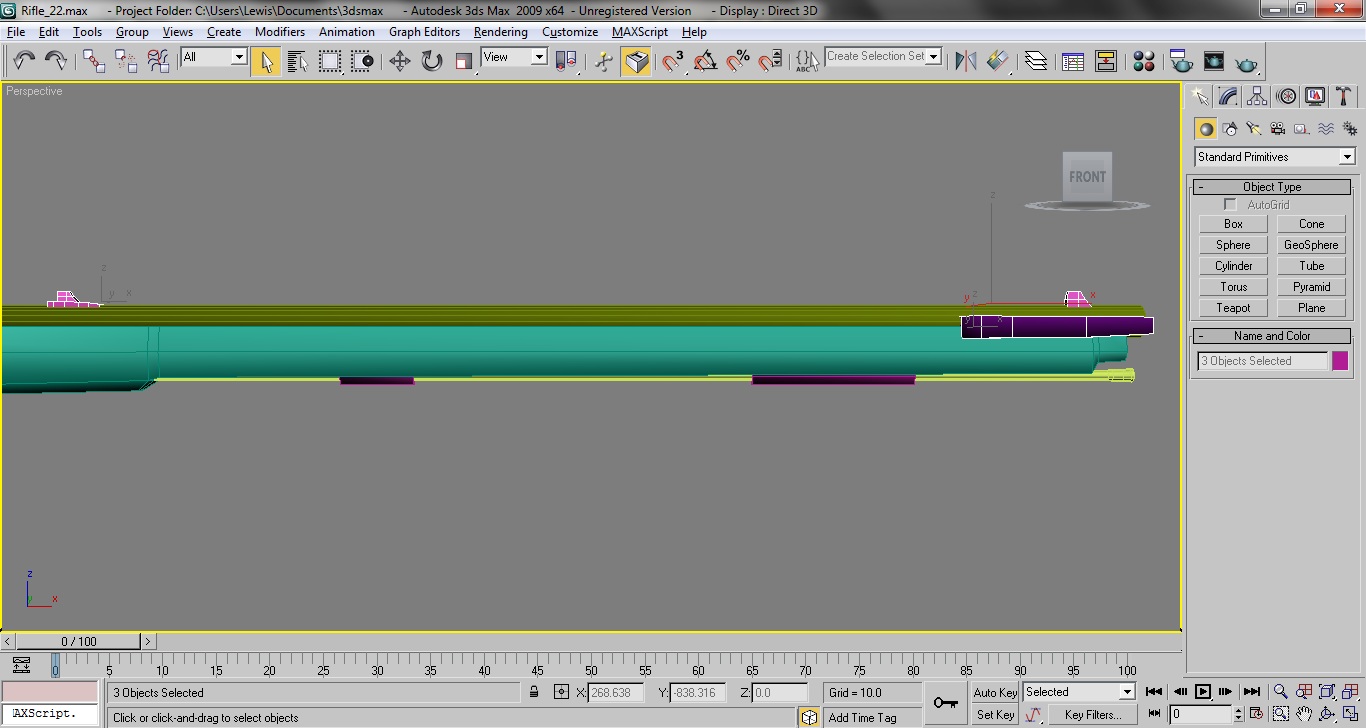
Baker Rifle
To create the Baker rifle I started by making a 6 sided cylinder. This was then changes to an editable poly and extruded whilst tweaking the vertices to form the body of the Rifle. I finally added a Meshsmooth modifier.

The next step I took was to create a long thin cylinder. This was then changed to an editable poly and extruded and scaled to form, the ramrod and ramrod tip.

I then made a box, turned it to an editable poly and extruded the edges along to form the trigger guard. I then added a Meshsmooth modifier. also made two long, thin 6 sided cylinders to form the ramrod tubes.

I then created a long cylinder which I made hollow by insetting and extruding the cap inwards after I turned it to an editable poly.
I also made a box, turned it into an editable poly and extruded the edges out to form the brass butt plate.

I then created a number of boxes and turned them into editable polys. I then in turn extruded each of the boxes edges along to form the different parts of the trigger assembly.

The final stage was to make three last boxes which I again turned to editable polys and extruded the edges out to form the sights and the bayonet attach point.
Spitfire
To create my Spitfire model I started by creating a box which I turned to an editable poly and extruded the edges down to form the outline of the Spitfire. I then tweaked the vertices in multiple viewports to further create the Spitfire outline.

I then cut the model down the middle and cut an extra line to form the beginning of the wing. I then tweaked the vertices to further create the Spitfire shape.

I then extruded the edges out along the beginning of the wing multiple times, tweaking the vertices as I went, to form the wing. I repeated this process on the fins at the tail end of the Spitfire.

The next step I took was to inset the polys at the bottom of the model and extrude them outwards to form the air intake vents.
I then created a scaled sphere to form the cockpit glass and an scaled cylinder to form the Spitefire nosecone.

I then inset the polys along the front side of the Spitfire and extruded them inwards to form the space where the engine exhaust would protrude.
I then created a number of hollow cylinders and put them inside the hole I had just made. This formed the Spitfire Engine.

I finally added a symmetry and Meshsmooth modifier to the Spitfire.

Roller Coaster
I started by creating a box which I turned to an editable poly. I then inset and extruded a number of polys to form the car interior. I then created a box and put it inside the car to create the seat.

The next step was to create a box and a number of cylinders which I scaled to form the roller coaster wheels. I also added a Turbosmooth modifier.

To create the track I made three long cylinders which I arranged into a triangle. I then made three smaller cylinders which I used to connect the three original cylinders. I then copied these smaller cylinders multiple times down the length of the large cylinders.

I finally added a bend modifier to the track. I then made a number of editable poly cylinders and boxes which I extruded to make the steel supports.

Elephant
I started using my old elephant as a template and created a plane which I turned to an editable poly. I then extruded the edges out and tweaked the vertices in multiple viewports to create the face and trunk of the elephant.

I carried on extruding the edges to create the tusk sockets and top of the head.

I then extruded the edges to form the mouth, ears and neck. I spent a lot of time tweaking the vertices to form the final elephant head.

The next step was to take the edge loop around the neck and extrude it down to form the elephant body. I took a poly, inset it and extruded it downwards to start forming the legs.

I carried on this process to form the back leg and the tail. I also extruded the vertices in multiple viewports to form the final back and belly of the elephant.

The final part of the model was to carry on extruding the legs down. IA symmetry modifier was then added and I created two spheres for eyes and two scaled cylinders for tusks.
I finally created sixteen Turbosmoothed boxes for nails.

Train
I started the train model my making a series of editable poly cylinders and boxes and edited them to form the train tank, train base and train cabin.

I then created more editable poly cylinders and boxes and edited them to form the cabin roof, wheels and cow catcher.

The final part of the train was to add boxes around the wheels and cylinders around the tank and base to add detail to the train.

Colchester Castle.
I started by making four boxes and one cylinder which I turned to editable polys and positioned them.

I then turned these objects into a single editable poly and extruded/scaled the edges to form the dome roof and ruins. I also created two editable poly boxes whose vertices I tweaked to form the roof. I then created a box which I scaled to form a door. This was copied and scaled to form the windows. I then made a series of boxes which I scaled and copied to form the bridge and hand rail.

The next stage was to then create some geometry which would act as detailing and add a small oak tree to the roof.

The final stage was to add a noise modifier to the model and tweak the settings to make the building look old and uneven.

Signs
To create the signs I created a Box which I turned to an editable poly. I then inset and extruded a poly to form the space where the picture would go.
I finally added four boxes to forum legs and supports.

Billboards
To create the billboards I created a Box which I turned to an editable poly. I then inset and extruded a poly to form the space where the picture would go.
I finally added four six to forum legs and supports.

3D Essex
I started by tracing the outline of a picture of Essex with the line tool. I then changes this to an editable poly.

I then took the line edge loop and extruded it downwards.

Visit Essex Logo
To create the logo I simply created a box which I scaled to be thin.

No comments:
Post a Comment